- Key Takeaways
- Understanding Spot UV Printing Fundamentals
- Preparing Your Design Software for Spot UV
- Essential File Setup Requirements
- Spot UV Artwork Checklist for Quality Results
- Creating Spot UV Layers in Adobe InDesign
- Working with Spot UV in Adobe Illustrator
- Text and Typography Guidelines
- Image and Vector Requirements
- Critical Design Considerations and Restrictions
- File Submission and Format Specifications
- Professional Print Production Tips by namecards.com.sg
- Conclusion
- FAQ
- What is Spot UV Coating?
- What are the common applications of Spot UV?
- What software should I use to prepare Spot UV artwork?
- What are the resolution and color mode requirements for Spot UV files?
- How should I set up Spot UV layers in InDesign and Illustrator?
- What are the guidelines for Spot UV text and typography?
- How should I prepare images and vectors for Spot UV printing?
- What design considerations should I keep in mind for Spot UV?
- How should I submit the Spot UV artwork files?

As a print design pro, making sure your artwork is ready for Spot UV finishing is key. This checklist covers all you need to know for Spot UV artwork. It includes image and text needs, file setup, and how to submit it. Follow this guide to make the printing process smoother, avoid delays, and impress your clients.
Key Takeaways #
- The checklist emphasizes the importance of design in conjunction with Spot UV Printing.
- Instructions cover the process for InDesign, Illustrator, and Photoshop, catering to different design programs.
- Checking separations using Adobe Acrobat is recommended to verify the accuracy of the Spot UV application.
- Spot UV printing is ideal for creating varied textures on a single printed surface.
- It is essential to supply Spot UV layer artwork as vectors, not raster-based files.
Understanding Spot UV Printing Fundamentals #
Spot UV printing adds a glossy UV coating to certain parts of a print. This makes the print stand out more, both visually and to the touch. It’s great for many types of prints, like magazines, brochures, and business cards.
What is Spot UV Coating? #
Spot UV coating makes certain parts of a print shiny and glossy. It can be applied on both sides, making the print look amazing. It works best on matte backgrounds, where the shiny spots really pop.
Benefits of Spot UV Finishing #
- Enhances visual appeal and creates a premium look
- Draws attention to specific design elements or branding
- Offers a tactile experience that engages the user
- Can be a cost-effective option with thin, flat UV coating
- Provides a range of finish options, including high gloss, matte, and textured
Common Applications #
Spot UV printing is used for many print materials, including:
- Business cards
- Flyers and brochures
- Presentation folders and folders
- Booklets and magazines
- Packaging and labels
- Greeting cards and invitations
Designers use it to make designs pop and to highlight important details. It adds a touch of luxury to any print, making it stand out and giving a premium feel to the audience.
Preparing Your Design Software for Spot UV #
Creating artwork for Spot UV printing requires careful preparation. Designers must use their software’s features to make sure their work is ready for printing. Adobe InDesign, Illustrator, and Photoshop have tools and guidelines for Spot UV finishing.
Start by setting your document to CMYK color mode and a high resolution (300 DPI). Make sure your artwork has bleed and safe zones. This ensures a smooth finish when it’s trimmed.
Next, create separate layers for your artwork and Spot UV elements. This makes it easier to apply the UV coating exactly where needed. Use software-specific methods, like a Spot Color channel in InDesign or a separate vector path in Illustrator.
| Design Software | Spot UV Preparation Tips |
|---|---|
| Adobe InDesign | Create a Spot Color for the UV coating and apply it to the desired areas. |
| Adobe Illustrator | Use a separate vector path to define the Spot UV elements. |
| Adobe Photoshop | Prepare a separate layer or channel for the Spot UV areas. |
By following these tips, your artwork will be ready for Spot UV printing. This will result in high-quality, eye-catching printed materials.
Essential File Setup Requirements #
To get your Spot UV printing right, focus on key details. Make sure your artwork is ready for printing by following these guidelines:
Resolution and Color Mode Settings #
Keep your design elements at a minimum of 300 dpi. This ensures your Spot UV looks sharp and clear. Use the CMYK color mode to match printing standards.
Bleed and Safe Zone Guidelines #
Add a 0.125-inch (3mm) bleed around your design. This extra space helps avoid white edges during printing. Make sure important text and images are at least 0.25 inches (6mm) from the edge.
Template Specifications #
Choose the right template for your Spot UV project. This could be a business card, brochure, or package design. Remove any non-printing guides before you submit your files.
For designs with Spot UV on both sides, create two PDFs. One for the front and one for the back. This ensures both sides are printed correctly.
| Spot UV Printing Requirement | Recommended Specification |
|---|---|
| Resolution | Minimum 300 dpi |
| Color Mode | CMYK |
| Bleed | 0.125 inch (3mm) |
| Safe Zone | Minimum 0.25 inch (6mm) from trim |
| File Submission | Two separate PDFs for two-sided projects |
Following these file setup tips ensures your Spot UV designs are printed perfectly.
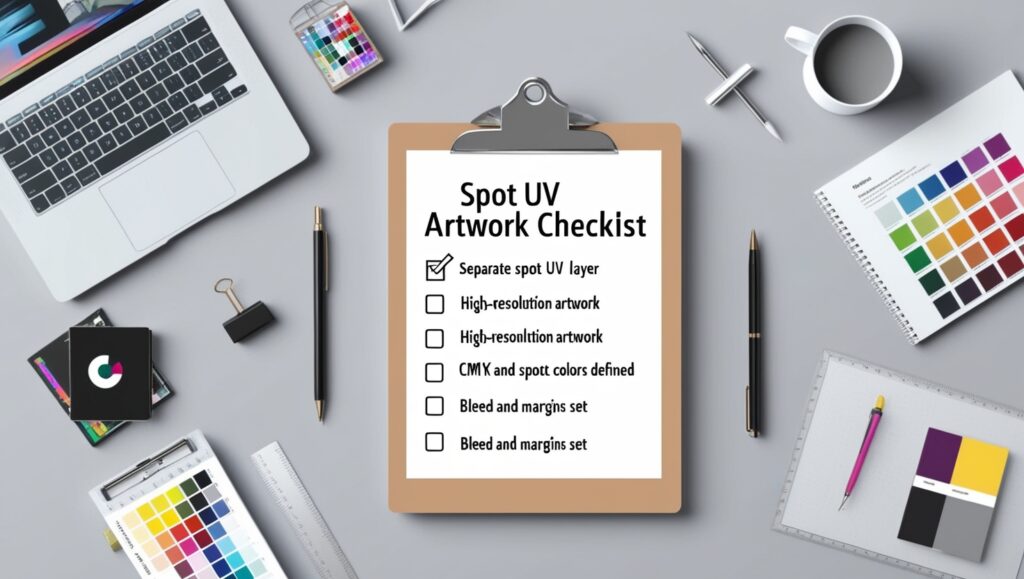
Spot UV Artwork Checklist for Quality Results #
Creating stunning print designs with spot UV finishing requires attention to detail. To ensure quality and success, follow this comprehensive checklist:
- Verify that all spot UV images are properly traced if using photographs or illustrations.
- Replace any spot UV artwork with 100% black (K=100) without gradients or tints.
- Carefully align spot UV elements to match the CMYK printing file precisely.
- Avoid applying spot UV as outlines or on gluing and folding lines.
- Confirm that all vital design elements are positioned within the safe zone, with no spot UV applied to critical areas.
By following this spot uv artwork checklist carefully, you can enhance the visual impact and quality of your print production. Remember, paying attention to every detail is essential for perfect quality control with spot UV finishing.
To ensure a smooth print production process, work closely with your print provider. Address any potential issues early on. With a deep understanding of spot UV printing and careful artwork preparation, you can improve your designs and achieve exceptional spot uv artwork checklist results.
Creating Spot UV Layers in Adobe InDesign #
Adding Spot UV to your print designs makes them pop. To do this in Adobe InDesign, just follow these steps:
Layer Organization Tips #
- Create a new layer named “Spot UV” above your artwork layer.
- Carefully copy and paste the objects you want to receive the Spot UV treatment onto the “Spot UV” layer.
Spot Color Creation Process #
To get the Spot UV coating right, you need a special spot color swatch:
- Go to the Swatches panel and create a new swatch named “Spot UV”.
- Set the color mode to Spot Color and choose 100% Magenta.
- Apply the “Spot UV” color to the elements on the “Spot UV” layer.
- Make sure to set the Spot UV objects to overprint to prevent any unwanted white gaps.
Export Settings Configuration #
When it’s time to print, follow these export tips:
- Export your file as a high-quality PDF, ensuring the “Spot UV” layer is visible.
- Include crop marks and a 0.375″ bleed to accommodate the Spot UV application.
- Name the file with a clear indication of the Spot UV content, such as “YourDesign_SpotUV.pdf”.
- Separately export a CMYK-only PDF with the same bleed and crop mark settings.
- Compare the Spot UV PDF with the CMYK PDF to confirm the Spot UV placement is correct.
By following these steps in Adobe InDesign, you can create stunning Spot UV layers that meet all the necessary design requirements for professional print production.
Working with Spot UV in Adobe Illustrator #
Adobe Illustrator is great for adding Spot UV effects to your designs. This technique makes your artwork pop with depth, shine, and contrast. It’s perfect for many print items, like business cards, postcards, and catalogs.
To start, make a new layer in Illustrator for your Spot UV elements. This keeps your design tidy and lets you control Spot UV precisely. Then, copy and paste the objects you want to highlight onto this new layer, making sure they match the artwork below.
Now, pick a color for your Spot UV. Make a new spot color swatch called “Spot UV” and set it to 100% Magenta. Use this color for your Spot UV elements and make sure they’re set to “Overprint” for the best look.
- Create a new layer for Spot UV above the artwork layer
- Copy and paste the objects for Spot UV onto the new layer
- Create a new spot color swatch named “Spot UV” with 100% Magenta
- Apply the “Spot UV” color to the Spot UV objects and set them to overprint
- Export the file as a PDF, ensuring both the artwork and Spot UV layers are visible and properly configured with the correct bleed settings
“Spot UV is a cost-effective technique that enhances the visual appeal of print products by highlighting specific design elements effectively.”
By following these steps, you can add Spot UV to your Adobe Illustrator designs. This will make your artwork preparation look amazing and your final product stand out.

Text and Typography Guidelines #
When designing for Spot UV printing, think about how typography and text will look. Following certain guidelines for fonts and text is key. It helps your Spot UV design look great and be easy to read.
Minimum Font Size Requirements #
A minimum font size of 5 points is best for Spot UV text. This rule is for all text, including logos. Using bigger fonts can make the Spot UV effect stand out more.
Font Style Recommendations #
Avoid sharp, Serif-style fonts for Spot UV. Go for rounded, sans-serif fonts like Arial or Helvetica. These fonts make the Spot UV coating look smooth and polished.
Text Conversion Rules #
Before printing, convert any text for Spot UV to outlines or vector paths. This step helps avoid problems with small or detailed text during the Spot UV process.
| Spot UV Printing Guideline | Recommendation |
|---|---|
| Minimum Font Size | 5 points or larger |
| Font Style | Sans-serif fonts (e.g., Arial, Helvetica, Futura) |
| Text Conversion | Convert to outlines or vector paths |
Following these typography and font guidelines ensures your text design is ready for Spot UV printing. You’ll get a stunning, high-quality result.
Image and Vector Requirements #
Spot UV is a versatile print finish that works well with many design elements. This includes text, shapes, solid colors, vectors, and images. It’s important to make sure the area for varnish is clearly marked.
For the best results, images should be high-resolution, at least 300 dpi. This ensures the Spot UV finish looks crisp and clear. Vector graphics are best for Spot UV because they are of higher quality and can be scaled up without losing detail.
It’s also key to keep the Spot UV and CMYK printing files aligned properly. This avoids any issues with misalignment. The Spot UV layer must match the design elements exactly for a perfect finish.
Image Preparation Recommendations #
- Use high-resolution images (minimum 300 dpi)
- Trace out the entire section for Spot UV application
- Avoid using low-resolution web graphics (72 dpi in RGB)
- Steer clear of JPEG, PNG, and GIF file formats
- Opt for vector graphics whenever possible
Spot UV Artwork Specifications #
- Resolution: 300 dpi or higher
- File Format: Adobe Acrobat Document 5 – version 1.4 (*.pdf)
- Color Mode: CMYK or Grayscale
- Accurate Registration: Ensure Spot UV layer aligns with CMYK design
By following these image preparation and vector graphics guidelines, your Spot UV artwork will be ready for printing. It will look high-quality and visually appealing.
Critical Design Considerations and Restrictions #
When using Spot UV in your designs, there are key things to keep in mind. First, don’t apply Spot UV where the material will be glued or folded. This can weaken the product. Also, Spot UV lines should be at least 0.5 points thick for sharp edges.
Pay close attention to how your design lines up. Misalignment can ruin the look of your Spot UV. It’s best to avoid using Spot UV as outlines to prevent these problems. Choose areas for Spot UV where the contrast with the background is high for the best look.
Avoiding Common Design Mistakes #
- Do not apply Spot UV on gluing or folding lines
- Ensure a minimum line thickness of 0.5 points for Spot UV
- Be cautious with registration and alignment, especially for complex designs
- Avoid using Spot UV as outlines to prevent misalignment problems
- Consider the contrast between Spot UV and the background color
Registration and Alignment Tips #
To get registration and alignment right, test your designs from different angles. This helps spot and fix any problems before printing. By following these tips, you can make your Spot UV effects stand out and improve your printed materials’ look.

File Submission and Format Specifications #
Getting your print-ready files ready for spot UV production is key for top-notch results. To make the file submission process smoother, follow these important tips:
- Save your artwork in PDF format at a minimum resolution of 300 dpi. This high-quality file format keeps your design’s integrity during printing.
- Make sure all your files are in the CMYK color mode. This color space is best for printing and brings out vibrant, true-to-life colors in your final product.
- If your design needs spot UV on both sides, create two separate PDF files – one for the front and one for the back. This lets the printer apply the spot UV coating accurately where it’s needed.
- Set up your artwork according to the printer’s specs, including bleed, trim lines, and safe zones. Following these guidelines helps avoid problems during the print production stage.
- Submit your files as either a single ZIP file or a single PDF file. This makes the file submission process easier and ensures all needed parts are sent together.
- Before sending, check that any guidelines or templates from the design process have been removed. This stops unwanted elements from showing up in the final print.
By sticking to these format specifications, you can be sure your spot UV project will be handled efficiently. And it will look amazing in the end.
“Attention to detail in file preparation is the key to a successful spot UV print job.”
Professional Print Production Tips by namecards.com.sg #
Namecards.com.sg is a top name in premium name cards. They share their vast knowledge to help you get the best print results, especially with Spot UV printing.
They suggest using Spot UV with a matte laminate finish. This combo makes your design pop with depth and dimension. Their team guides you through file prep, color management, and design for Spot UV, ensuring top-notch results.
Their Knowledge Base is packed with design tips and industry advice, covering 78% of their content. They help you choose the right paper and printing techniques like Spot UV and foil stamping. This way, your name cards will look amazing.
They also talk about eco-friendly printing, like using recycled paper and water-based inks. This shows their commitment to the environment and responsible business practices.
Whether you’re a pro designer or a business owner, namecards.com.sg’s advice is priceless. Their tips will make your Spot UV printed name cards stand out, showing your dedication to quality and detail.
“Their experience ensures high-quality results and helps clients avoid common pitfalls in Spot UV design and production.”
| Key Print Production Tips | Recommended Practices |
|---|---|
| File Preparation |
|
| Design Considerations |
|
| Sustainable Printing |
|
Conclusion #
This Spot UV artwork checklist covers everything you need for top-notch Spot UV printing. By following these steps, designers can make sure their work is professional. They can also avoid mistakes and get amazing Spot UV effects.
Using this checklist regularly makes the print process smoother. It leads to better final products.
The guide teaches you about Spot UV basics, setting up design software, and following file rules. It also shows how to use Adobe InDesign and Illustrator well. Paying attention to details like text, images, and design choices is crucial for great Spot UV prints.
This checklist is a must-have for designers and print experts. It helps you create custom items like rack cards, business cards, and packaging. By applying these tips, you can improve your print design and ensure quality control in your spot uv artwork checklist.


