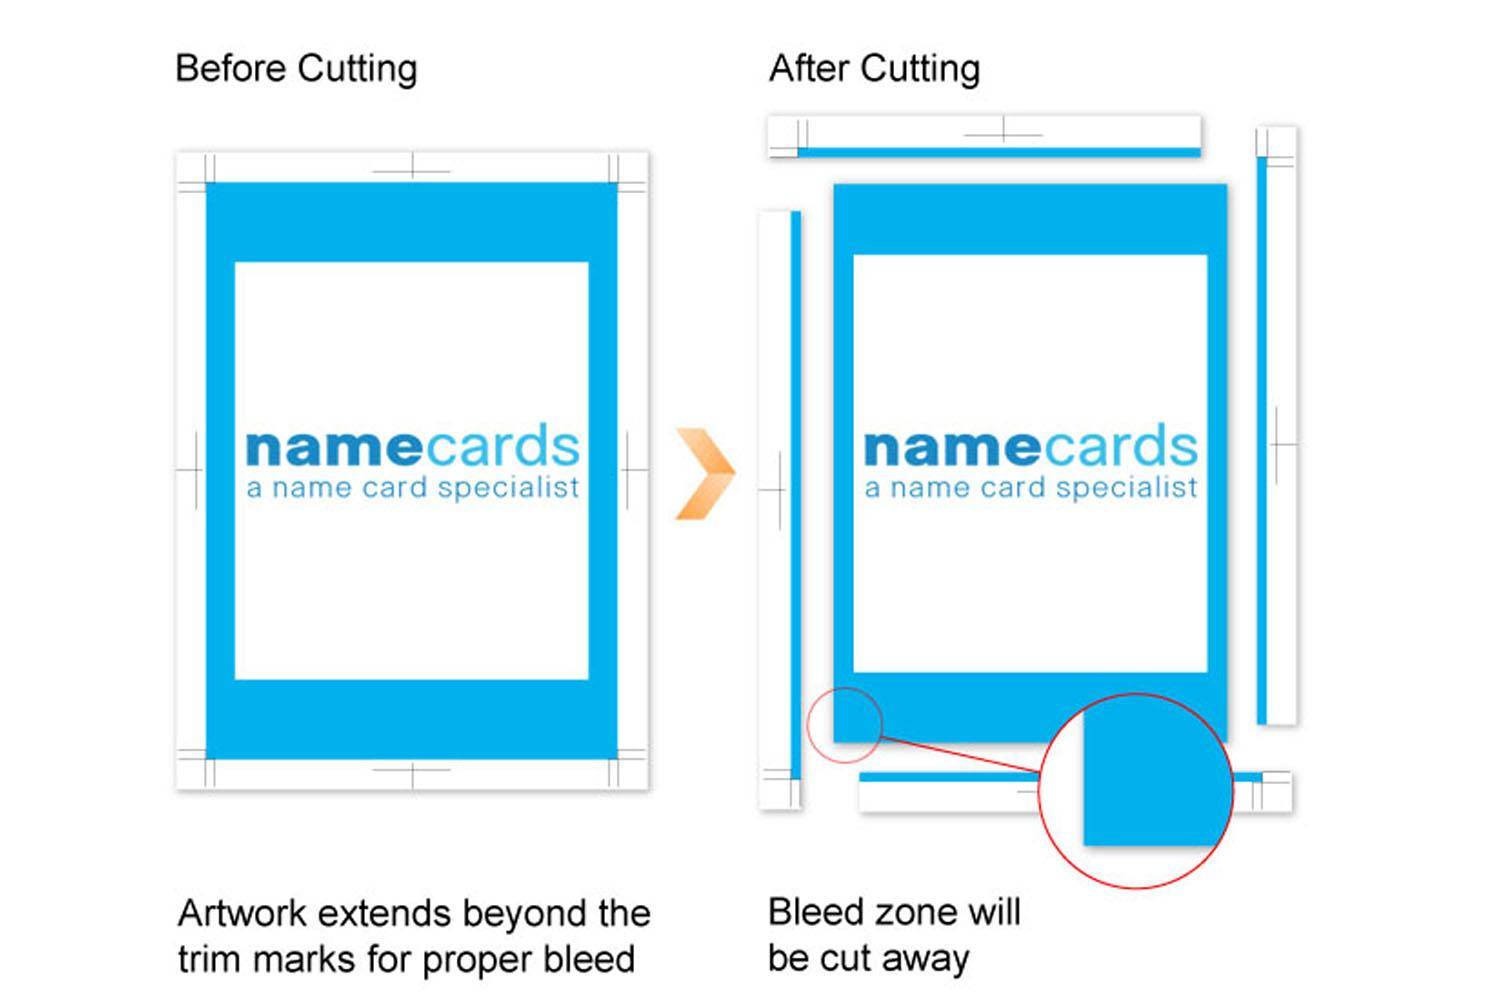
Setting up your name card artwork correctly is essential for achieving a professional, polished final product. Properly configured artwork prevents issues like white edges, unintended cuts, or cropped elements. For optimal results, understanding the concepts of bleed, trim, and safe zones is crucial. The following guidelines, measured in millimeters for precision, will help you design name cards that print perfectly. As a reference, the finished size of a standard name card is 89mm x 54mm (3.50″ x 2.12″).
Understanding Bleed in Print Design #
If you’re new to print design, the term “bleed” refers to the extra space beyond the finished edge of your card. This additional margin ensures that images, colors, or backgrounds that extend to the edge of the card print without leaving any unintentional white borders. When a design is printed and then cut to size, a slight shift in the cutting process can occur. By extending your artwork into the bleed area, you prevent this shift from impacting the design’s appearance.
For instance, if you want a photo, background color, or graphic element to reach the very edge of the card, you must extend it 2mm beyond the final card size on each side. This means that for a standard name card with a finished size of 89mm x 54mm, your artwork dimensions should be 93mm x 58mm. This extra 2mm bleed on all sides ensures your design appears exactly as intended once cut.
Artwork Dimensions for Name Cards #
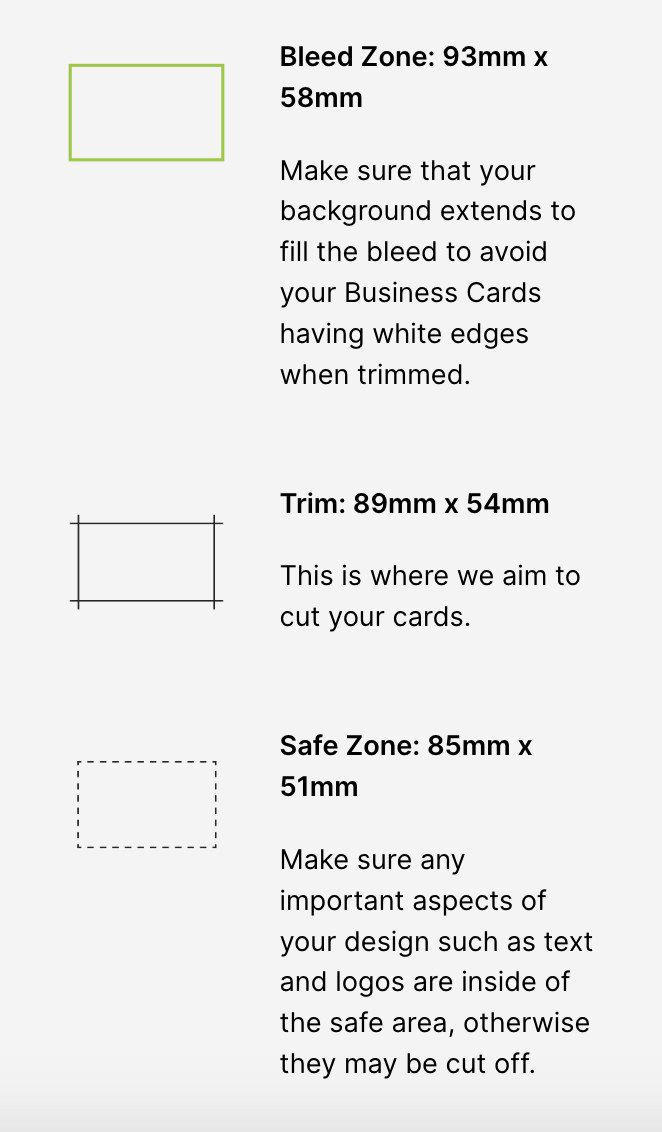
To prepare a print-ready name card with bleed, set up your artwork with the following dimensions:
- Bleed Zone: 93mm x 58mm – This includes an extra 2mm of bleed on each side to prevent white edges. Ensure your background or any design elements that reach the edge extend to fill this area.
- Trim Size: 89mm x 54mm – This is the final size of your name card after trimming. The trim line marks where we aim to cut, but slight variations (up to 2mm) may occur during the cutting process.
- Safe Zone: 85mm x 51mm – This inner area ensures that essential design elements, like text and logos, are safe from accidental cuts. Keep important information within this zone to avoid any issues.

Key Zones Explained: Bleed, Trim, and Safe Area #
- Bleed Zone (93mm x 58mm):
- Extending backgrounds, images, or colors beyond the trim line into the bleed area prevents white edges after trimming.
- This is particularly important for full-bleed designs, where you want the image or color to reach the edge of the card without interruption.
- Any elements in this zone will be cut off, so avoid placing essential content, such as text or logos, here.
- Trim Line (89mm x 54mm):
- The trim line indicates where the name card will be cut to its final size. While this is the target line for cutting, minor variations of up to 2mm can occur.
- This variation is a standard part of the printing and cutting process. For this reason, it’s crucial not to place any essential design elements directly on the trim line.
- Safe Zone (85mm x 51mm):
- The safe zone is an inner margin that keeps important elements, like text and logos, away from the edges. By placing critical content within this zone, you minimize the risk of accidental cutting.
- Think of the safe zone as a buffer area where all vital information should be located to ensure a clean, professional look.

Additional Considerations for Print-Ready Name Cards #
Understanding and utilizing bleed, trim, and safe zones are fundamental to creating print-ready files. However, there are a few other essential elements to keep in mind when preparing name card artwork.
- Cut Zone (Trim Marks):
- Trim marks show the exact boundaries for cutting. These marks are placed outside the bleed area to guide the printer and ensure accurate cuts.
- During the cutting process, the machine may shift up to 2mm in any direction. This is why adding bleed and respecting the safe zone is crucial to avoid unexpected results.
- Full Bleed Design Requirements:
- If your design features colored backgrounds, images, or patterns that extend to the edge of the card, make sure these elements reach the full bleed margin.
- Designs that don’t extend to the bleed margin may result in unintended white strips along the edges due to slight variations in the cutting process.
- Text and Essential Element Placement:
- Placing text and logos within the safe zone ensures they are not accidentally trimmed. Avoid positioning important elements too close to the trim line to prevent unintentional cropping.
- For a balanced look, keep these elements at least 2mm away from the edge within the safe area.
How to Set Up Bleed in Design Software #
Most professional design software, such as Adobe Illustrator, InDesign, and Photoshop, allows you to set up bleed dimensions when creating a new document. Simply enter the bleed measurements (2mm on each side) during setup. If using a template, ensure the bleed and safe zones are pre-configured.
- Adobe Illustrator:
- When creating a new document, go to the “Bleed” settings and enter 2mm on all sides.
- Use guides to mark the trim line and safe zone for reference as you design.
- Adobe InDesign:
- Set up your document with 2mm bleed on each side and use the “Margins” setting to mark the safe zone.
- Photoshop:
- Add 2mm to the dimensions of your canvas to accommodate the bleed area. For a standard name card, this means setting your canvas size to 93mm x 58mm.
- Use guides to mark the trim line (89mm x 54mm) and the safe zone (85mm x 51mm) within the artwork.
Final Checklist for Print-Ready Name Cards #
- Confirm Dimensions: Ensure your artwork is 93mm x 58mm, including the 2mm bleed on each side.
- Extend Backgrounds to Bleed: Make sure any full-bleed backgrounds or images extend to the bleed area.
- Keep Essential Elements in Safe Zone: Place important content, like text and logos, within the 85mm x 51mm safe zone.
- Use Trim Marks: Ensure trim marks are set for guidance, but avoid placing essential elements on the trim line itself.
By following these guidelines, you’ll achieve a professional, high-quality name card that prints exactly as intended, with no unexpected white edges, missing elements, or cropped text. Proper preparation is the key to ensuring that your name card makes a lasting impression.


